Wood is always a good base for handicrafts, and the most common wood can be found in our kitchens. Planks, spoons, blades – all of this can be creatively used, so this year’s Easter DIY, the Easter hare, is made of two kitchen blades.
Who would have thought that washing could have inspired a person?
Yet. In fact, I don’t wash it away too much. I am lucky enough to have a homemade Mary who washes me away. And that was also the case with the acquisition of Mary! I denied like a donkey that I don’t need a dishwasher for anything, because I like to wash it off and a dot. Why I was so perplexed, I do not know until today. At the end of the day I forgave up. Mary stood in the kitchen and I loved her so much! And I don’t like washing too much anymore.
Anyway, I have to wash something there, for example wooden blades. I put them on my dishwasher and what do I see? The hare!
The blades were already to be replaced, so I took them without regret. One was smaller and the other larger, but thanks to that the hare is a bit more sour. This is how the prototype was made. I bought another hare for the blade, but if you have an old blade, it is also very suitable.
Easter haunting made of wooden shoulder-blades
Materials required:
two wooden blades
two traffic jams
jute
white paint
glue
two wooden beads
raffia
a piece of pink foam
a coloured cord or yarn
brushes, scissors, screwdrivers
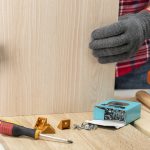
I paint the upper part of the blades and stoppers in white. I do it without water and I don’t want it to be very accurate – I want wood to clear through somewhere.
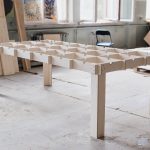
After the paint has dried out, I place the blades underneath the bevel so that they form a straight line at the bottom. I glue the blades together – you have to press it down for a while so that the glue can be grasped.
The blades folded together in this way do not form a flat surface, but you will not see it. Instead, I use these hollows and glue two long pieces of string together, one on one side and the other on the other. It is the beginning of busy legs.
I start wrapping. I glue the beginning of the string together.
I wrap it starting from the top. I do not pull the string too tightly. It goes very fast.
Finally, I have to slow down the wrapping speed a bit, because I glue the string together again. I grease the side and one side of each blade with glue – the one that is higher. I hide the end of the string between the shoulder blades.
The hare base is finished. It’s time to finish your legs.
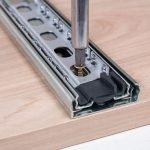
I screw a screwdriver into the middle of the plug – about halfway through. I’m going to remove it. I repeat the same operation on the other side and this time I screw in the screwdriver to the end until it goes outside. Some fern falls out of the middle of the cork.
I push the end of the string through the plug with a screwdriver. I do the same with the second traffic jam.
I set the length of my legs – I decided to make one longer and the other shorter. At the chosen height I tie up the knots and cut off the unnecessary string.
Now it’s time for a fairy tale. I roll up the reef and tie it up in the middle. I cut the nose out of pink foam. I chose wooden beads with my eyes in mind. I glue everything together.
I will decorate my Easter hare still. In fact, I wanted to decorate it differently from the first one I made a bow and wrapped it in a pink yarn, but in the end I did the same, only that instead of the yarn I used a paper string. Something pulls me to a pink.
I can pass the hanging cord through the holes in the spoon.
My hares, or basically my hare ladies, will probably hang in the kitchen window. Although I can’t really decide because that’s how I like it to be when I put my leg on when my hare is sitting.
And so Marysia washed away and I had time for a little Easter DIY. I’m a bit afraid of her recently, because two years have passed – the warranty period is over, it can always go wrong. Oh, no matter how I want it to happen. But you quickly get used to the good.
I’m already quietly dreaming about another helper, who would ride around the house and clean the floors. Oh, dream a good thing so that such a wooden Easter hare can fulfill your wishes!
And what surprise did you dream of from your Easter hare?
I greet
Agnes
Did I inspire you? That is great!
I will be very pleased if you tell me about it – facebook, instagram – as you prefer. Simply upload the photo and mark it with #321 Stardips or @321 Stardips.
You also need to know that I am still doing something and I will do many more projects myself, and I will save the ways of doing it and my knowledge on this blog – if you like my fanpage, you will not miss anything.
Wooden vane DIY